The Loft
Christmas 2008 - Two separate factors came together to seed the idea of improving the loft space.
1) Upgrade the existing small workroom to make it more usable and comfortable.
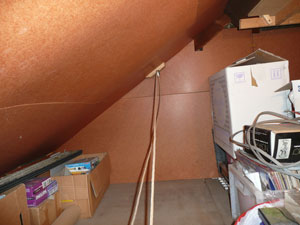
The space was created more than 20 years ago - a small 'room' with chipboard flooring, hardboard lined and nominally insulated walls/roof and a new rooflight. A model railway layout was originally planned to run around the perimeter which was only developed into a test-track for new loco's. A small bench under the rooflight and a radio made it a great little retreat. However, the hardboard had begun to warp opening up the joints and encouraging draughts. Magpie-syndrome also meant that space became difficult to work in and so became .... unused.
2) Improve the general loft insulation.
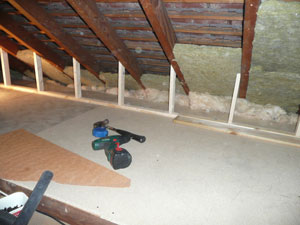
The winter cold spell, increasing fuel prices and displays of 'top-up' insulation in DIY stores prompted some research. The existing 100mm insulation between the ceiling joists was ok - once, but 270mm was the current recommendation, with 170mm rolls available to lay over the existing.
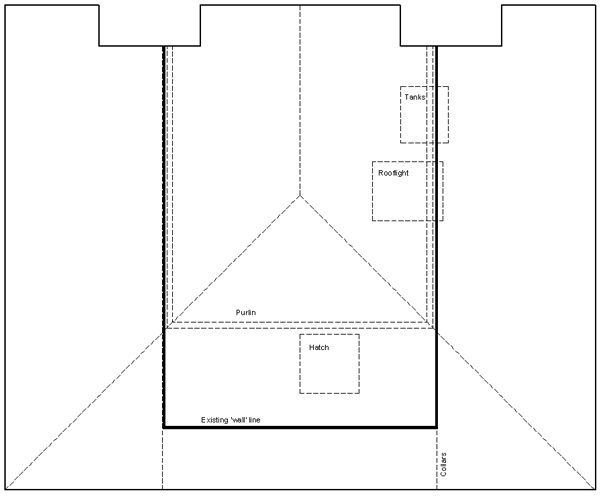 Existing plan and section
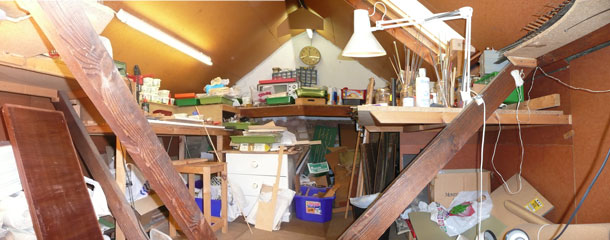
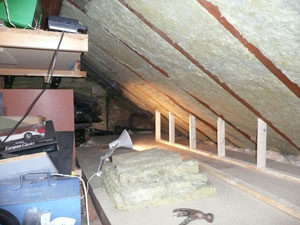
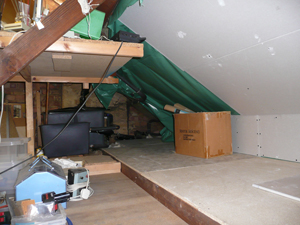
The loft workshop - note the purlin props, hardbopard lining, back-to-back work benches and rooflight. Oh, and just a little bit of clutter! A bit more storage space would be handy.
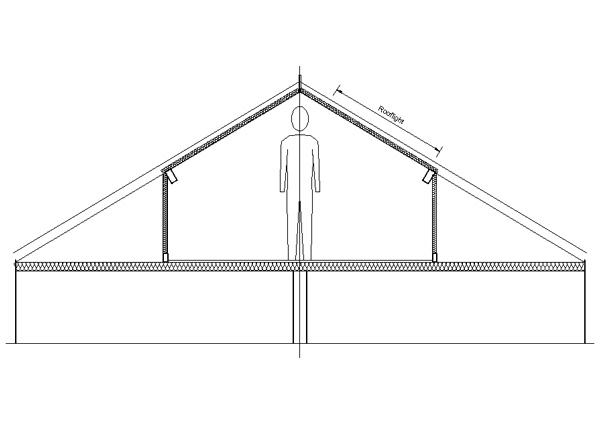
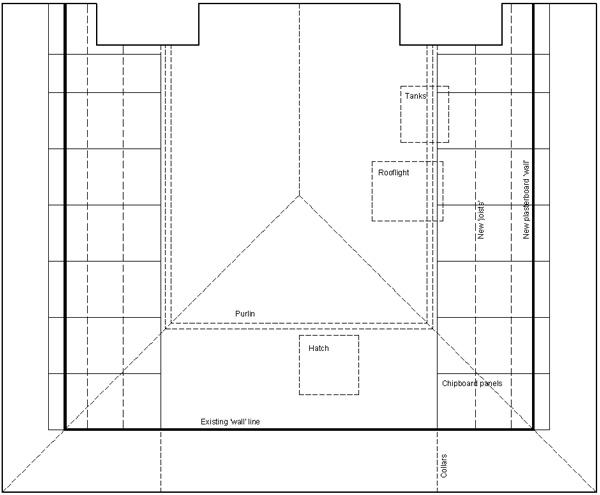 Proposed plan and section
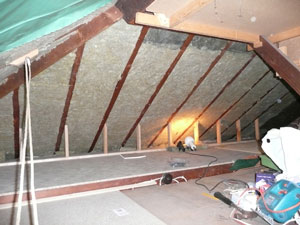
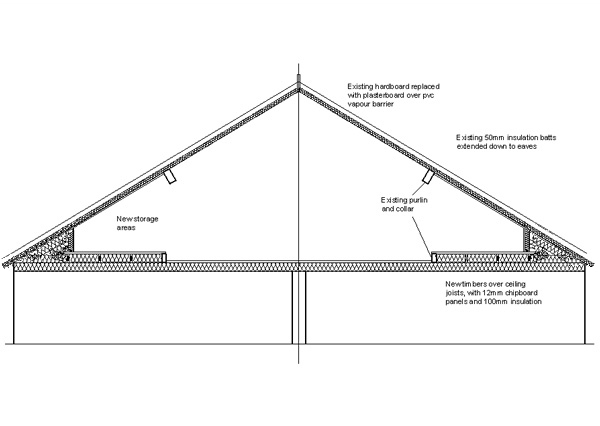 Extending the working area into the voids/eaves would serve two purposes - create extra storage space but also make installation easier.
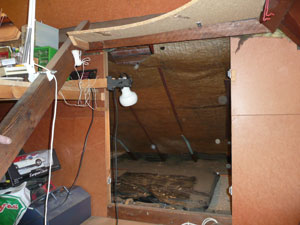
Hatches in the hardboard linings give access to the small voids front & rear.
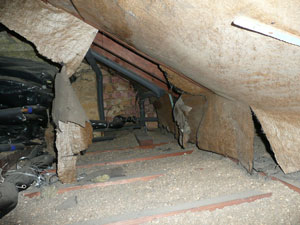
The roof had been lined on the underside of the rafters with a building paper that has long since become brittle and broken. Also, the tanks and pipework were in the 'cold' spaces and, therefore, vulnerable.
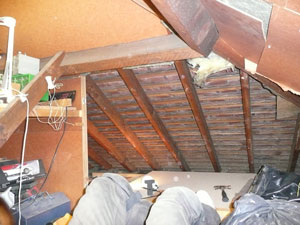
Working in the small voids was easier with a platform, so the 100x22 spreaders and chipboard decks were installed first, with 100mm insulation inside. The building paper (together with a few decades of dirt) could then be stripped and bagged - a flithy, throat clogging job, even with a mask.
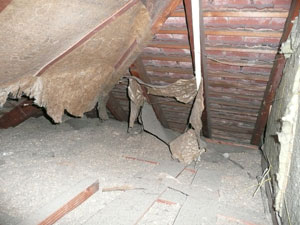
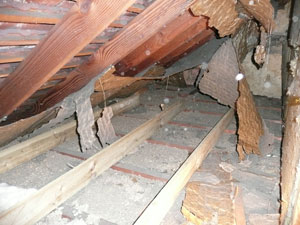
The original loft insulation is chopped paper, but this could not be installed down into the eaves, so the edge of the house was uninsulated. The new insulation batts were installed right down to the wall plates. Loose insulation was fitted in the perimeter voids. A lightweight timber frame was built between the deck and rafters.
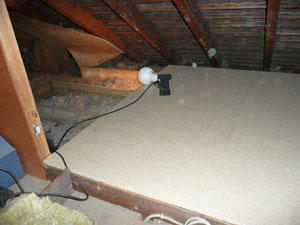
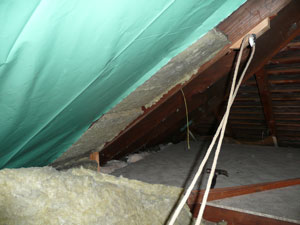
50mm insulation batts were installed right up the roof to the purlins (leaving a 50mm air gap under the tiles) and abutting the existing batts around 'the room'. Note the darker insulation at the top where 20 years of dirt has infiltrated.
 A polythene sheet was then laid over the insulation. Strictly speaking, this is a vapour barrier to prevent warm, moist air from the room passing out into the insulation and becoming condensation in cold weather. Here, as an airtight seal in unlikely, it was as much to prevent draughts, but joints were well taped.
Plasterboard was then fixed underneath. These were purpose-made 1220x600 sheets with nice rounded long edges (cut ends) and they went up through the hatch easily.
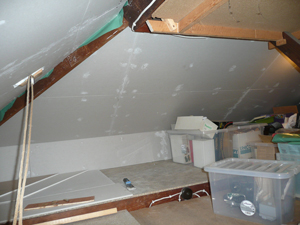
 Boarding is complete on the front and the screw holes filled, awaiting sanding. Boxes are being purchased regularly to enable all of the loose stuff to be stored properly. New lights have been installed in the new eaves areas, using low wattage long-life lamps. The rear area boards have yet to be finished, but the last of the wall around the tanks and the old tank lagging has all been removed to provide much better access.
After struggling up and down the aluminium ladder and through the small opening for so long, I've decided that a new ladder & hatch were a must. So a new insulated, 3-section folding, sprung-loaded 1200x700 (twice the length) step ladder is on its way. I've just got to make the opening bigger, adapt the ladder to the rather tight landing space and bob's your uncle.

Doesn't that look nice? And comfortable too!
To be continued ...